SETUP LIFERAY IN WINDOWS
Requirements
-------------------
- Eclipse or Liferay IDE
- Eclipse Liferay IDE plugin
- Liferay IDE
- Liferay Plugin SDK
- Liferay Portal Server with Bundle of Tomcat
- MySQL Server
- MySQL Client
- Configure Portal-Ext Properties For MySQL Setup
Eclipse IDE
---------------
a. Eclipse Liferay IDE plugin
While using Eclipse IDE for Liferay Development we have to install Liferay IDE components from Eclipse Market place follow the below steps to do the process.
- Download Eclipse IDE from this place : https://eclipse.org/downloads/

- Select the version, Operating system and System Architecture (Ex: Eclipse IDE for JAVA EE , Windows and 64 bit).
- Once Downloaded then open the eclipse.exe
- After eclipse started goto top menu help → Install new software →type the url or select from offline package.

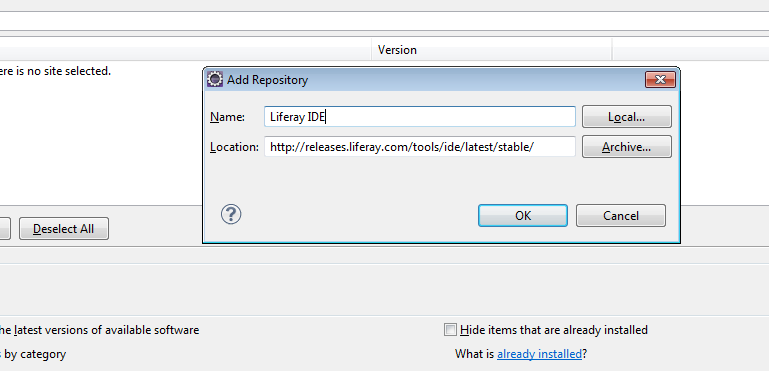
- Then Enter as Liferay IDE then click ok
- Select all the check box from the list then click install→ click Accept

- Once Installation done then restart your eclipse.
- Now got Help → About.
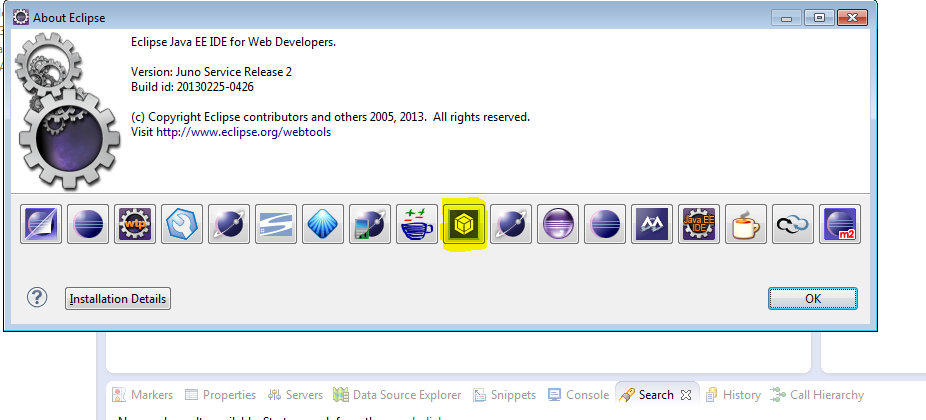
- Now if you can able to see Highlighted logo in your eclipse then Liferay IDE installed successfully.
b. Liferay IDE
---------------
Liferay IDE setup in window follow the below process.
- Open the following URL : https://www.liferay.com/downloads/liferay-projects/liferay-ide
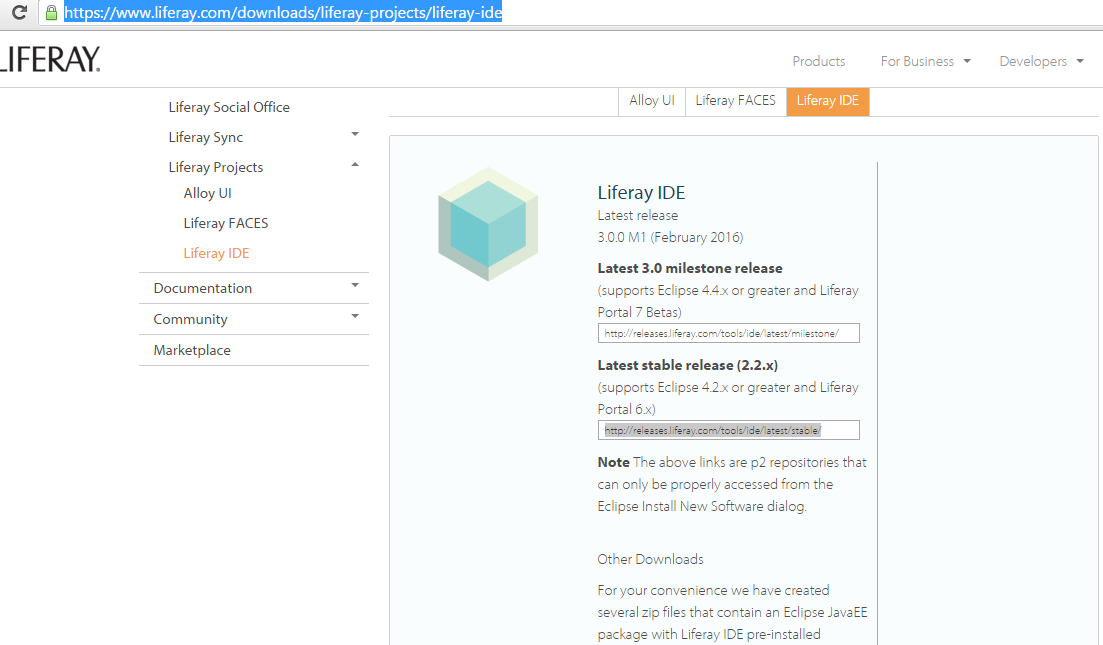
- Select Appropriate Version then click download.

- Once download complete open the package.
2. Liferay Plugin SDK Download and Setup
Follow the below process to download and setup Liferay Plugin SDK in Eclipse.
- Download Liferay Plugin SDK from the following Location. (Path : https://www.liferay.com/downloads/liferay-portal/available-releases ).

- Select Plugins SDK Option then click Download.
- Once Downloaded follow the below process.
- Open the Eclipse where we have installed Liferay IDE.
- Goto Window → Preference → Liferay

- Click Configure installed Liferay plugin SDKs
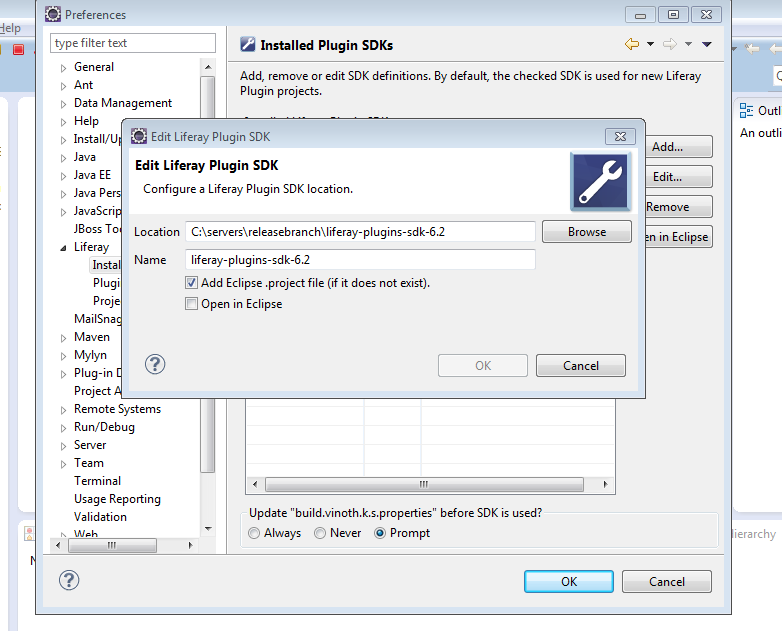
- Click Add → Browse to select Liferay Plugin SDK folder.
- Check Add Eclipse .project file
- Then click ok.
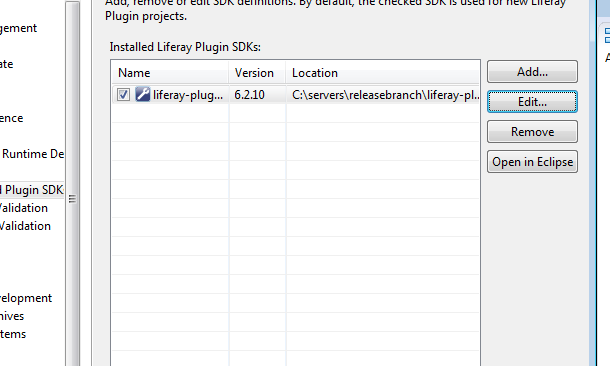
- Now Liferay Plugin SDK Configured.
3. Liferay Bundled with Tomcat
Follow the below process to install Liferay Tomcat Bundled Server.
- Download Liferay bundled with Tomcat in following location : https://www.liferay.com/downloads/liferay-portal/available-releases

- Click Download once Download finished follow the below process.
- Open Winodw → Prefrence → Liferay

- Click create a new Liferay runtime environment.
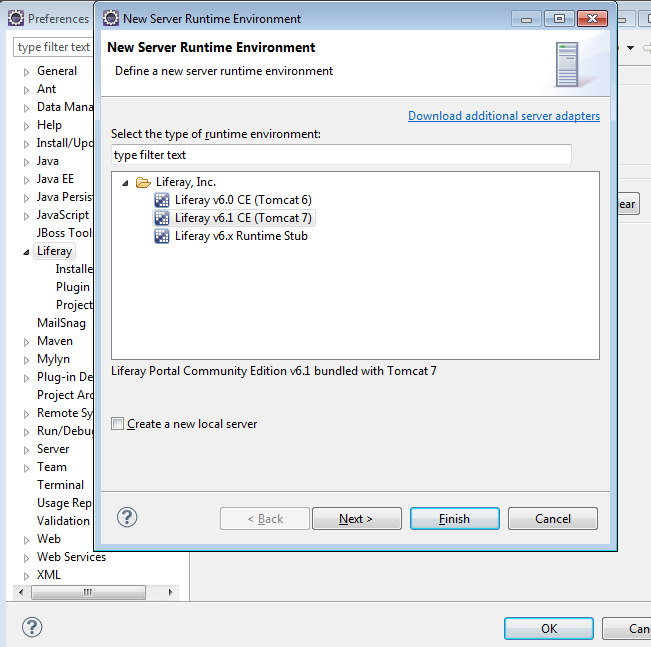
- Click Select Liferay 6.1 CE (Tomcat 7) Option.
- Click the Next and click browse button to select server path
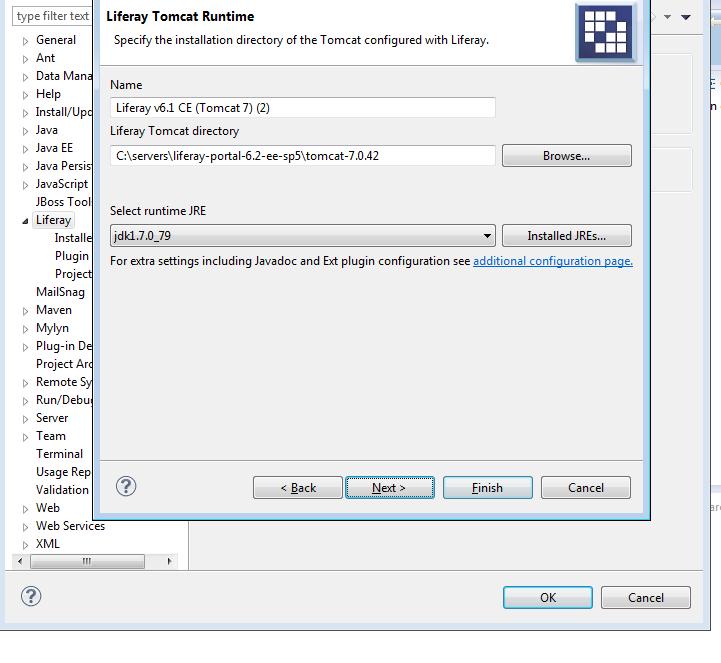
- Once Server is selected then select proper JRE then click finish.
- Click the Finish.
MySQL Server Setup
Setting up MySQL server first we have to download the binary from below location and follow the following process to install.
- http://dev.mysql.com/downloads/ download MySQL server from the location.
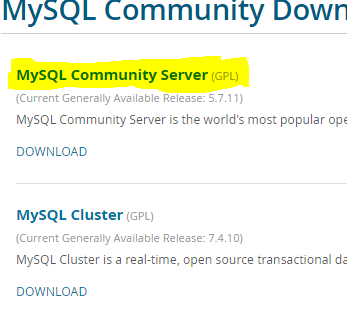
- Click Download Button.
- Once Download Complete open the package and follow the instruction from the screen to finish the installation.
MySQL Client
Mysql Client we can use many toll or built-inn console to access DB. (Ex: Sqlyog).
- Download SQLyog from the following location. Location : https://www.webyog.com/product/downloads

- Select Machine Architecture then Click Download.
- Once Download Complete Open the SQLyog package.
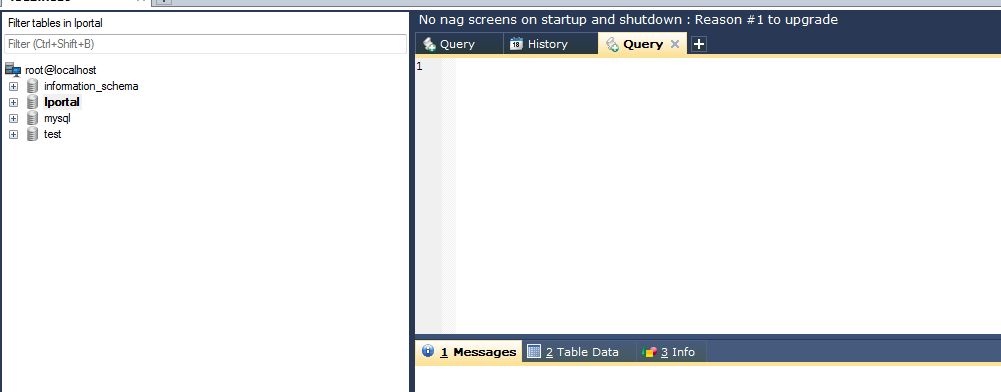
- Create new lportal db.
- Finish close the SQLyog.
Configure Liferay- Portal-ext.properties for DB Configuration.
Just use the below properties in below path : <Your Machine Path>liferay-portal-6.2-ee-sp5\tomcat-7.0.42\webapps\ROOT\WEB-INF\classes
- Use the below configuration in portal-ext.properties
jdbc.default.driverClassName=com.mysql.jdbc.Driver
jdbc.default.url=jdbc:mysql://localhost/<Newly created DB anem>?useUnicode=true&characterEncoding=UTF-8&useFastDateParsing=false
jdbc.default.username=<mysql username>
jdbc.default.password=<mysql Password>
- Once add the new values save this file then start the server server auto create required database entries from the default script.